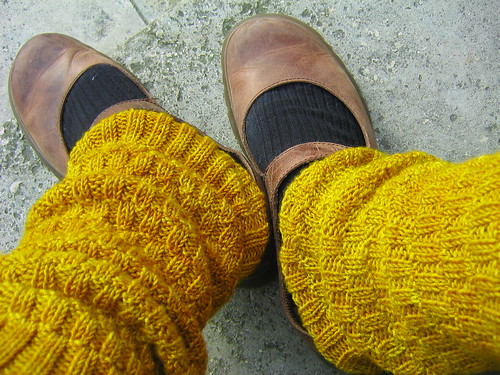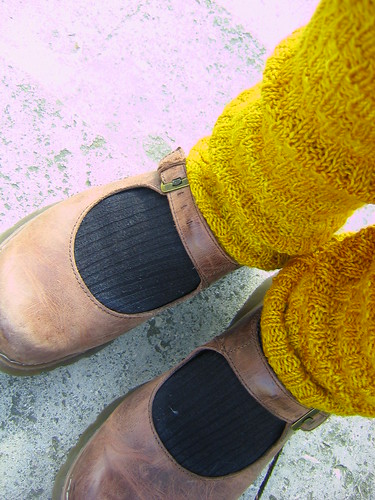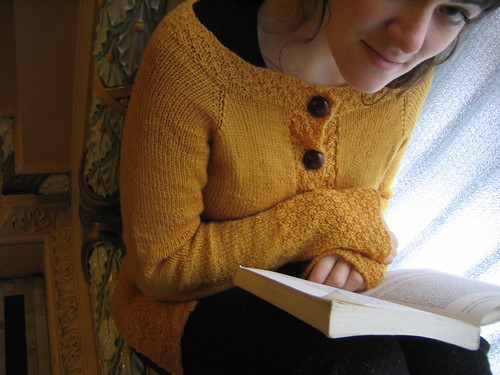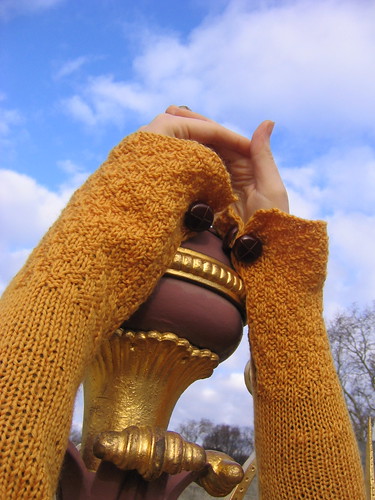
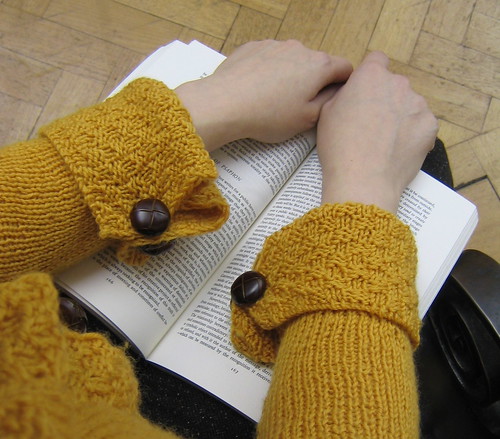
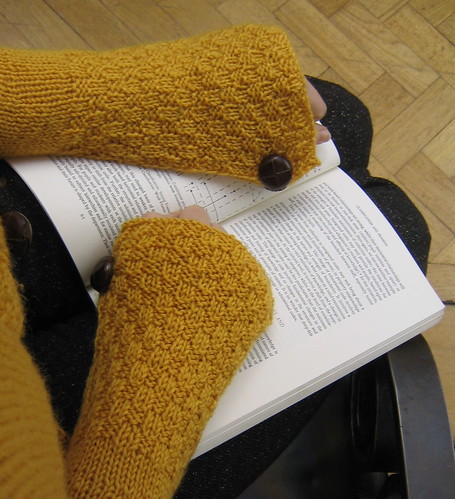
Cardigans, like Spring, are a matter of transitions, and this is a piece for layering through changeable weather. A relatively loose-knit garment (kept in check with some side-shaping), yet also long enough to keep your bottom warm. It’s a simple knit, but with some neat finishing touches to keep a proficient knitter entertained passed television-knitting and teach newbies a few tricks. Chief amongst these being flexible, reversible, sleeves you can fold up (to keep out of the way while working) or wear low (to cover and comfort hands on colder days).
It's named Brompton after
a bit of London I've been lucky enough to work, play, teach and study in for just shy of a decade. Once a bohemian artist's quarter, the area became substantively gentrified after the
Great Exhibition which also left us some of the grandest Victorian architecture in the world – galleries, lecture rooms, libraries, concert halls and monuments. But the place maintains a more anarchic, arty feel with the Royal Colleges of Mines, Science, Art and Music, not to mention the hoards of schoolkids pouring in and out of the national museums every day.
Photographer credit: Marcus Roome.Designer: Alice Bell, under a
non-commercial unported license.
Gauge: 18sts/22 rows = 4" in stockinette stitch using larger needle.
Size: XS [S, M, L, 1X, 2X, 3X, 4x, 5x] based on
these sizing measurements. Shown in M, lengthened to fit a 5’ 9” woman.
Finished Measurements: Chest: 32 [36, 40, 44, 48, 52, 56, 60, 64] inches, note there are 2-3 inches of ease in the pattern. Length: custom fit.
Materials:
- Cygnet Superwash Pure Wool DK [100% wool; 114yd/104m per 50g skein]; color: Gold; 7 [8, 8, 9, 9, 10, 10, 11, 12] skeins
- US 5/ 3.75mm circular needle, approx. 32 length-inch length (see pattern notes for further details on needles).
- US 3/ 3.25mm circular needle, approx. 32 length-inch length.
- Waste yarn (a few meter's worth, preferably of similar weight, different color, smooth - cotton is good).
- Two large safety pins (st holder or waste yarn will do as substitution) and at least 8 smaller pins for seaming.
- 4 stitch markers.
- Darning needle.
- 10 Buttons (see pattern notes for more detail on buttons).
Pattern notes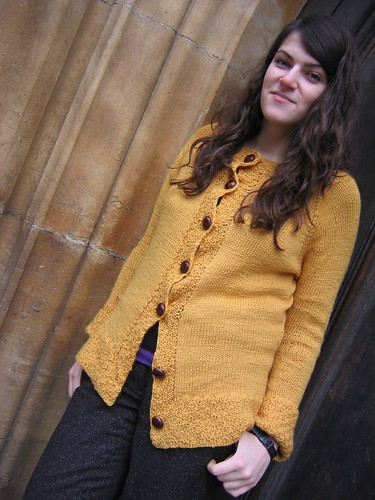
The needle requirements assume that you are happy to work magic loop and use a circular for flat work. You may wish to use straights and dpns, in which case you will need each for each size, but a circular of the larger size is still advised for the yoke, as it you have to work a large number of sts at once. You would only need dpns for the sleeves, which can also be worked flat and seamed later if you prefer. Even if you are happy to use a circular for flat work, a set of size 3 straights might be worthwhile for the button band, as working a small number of sts on a circular can be frustrating.
The button requirements are stated as 10, but the pictured garment used 11 large buttons (28mm diameter) and 7 smaller ones (15mm). This is because I added an extra button for a longer piece (I am 5’9”), and backed the rather heavy buttons down the front for stability.
Unless the pattern specifically states otherwise, when working flat slip the first st of every every row, and knit of the last st of every row, regardless of side. This makes for neat edges and easy seaming, and is especially important in the basket-weave sections.
3-row basket-weave stitch (worked over a multiple of 4 sts)
Row 1: [k2, p2] to end
Row 2: [p2, k2] to end
Row 3: [k2, p2] to end
Row 4: [k2, p2] to end
Row 5: [p2, k2] to end
Row 6: [k2, p2] to end
The pattern has a relatively loose gauge and generous ease; you may wish to go down a needle size for a denser fabric and/or tighter garment.
As a top-down raglan, you can adjust to custom-fit the piece. Make sure you stand up when doing this for accurate measurements.
Please note, at time of publishing this pattern is untested. All comments and questions are best placed in this blog post, where I'll also try to answer the as best (and as quickly) as I can.
Pattern
Neck:Using size 3 needles cast on 92 [108, 124, 140, 156, 172, 188, 204, 220] sts. I used cable cast on, but choose your own favorite method.
Work in basket-weave sts for for 7 rows.
(WS) At the start of the 8th row, keep in basket-weave pattern but bind off the 5th and 6th sts, casting them back on when you get back to this point on the 9th row (i.e. make a button-hole).
Work another 3 rows in basket-weave.
(RS) Work 10 sts in pattern and hold these on a large safety pin, change to size 5 needles, k9 [13, 15, 17, 19, 22, 24, 27, 29], pm, k12 [14, 18, 20, 22, 24, 28, 31, 34], pm, k32 [34, 38, 46, 54, 60, 62, 68, 73], pm, k12 [14, 18, 20, 22, 24, 28, 31, 34], pm, k9 [13, 15, 17, 19, 22, 24, 27, 29], pm, hold the remaining 10 sts on a safety pin.
(WS) slip the first stitch and purl back.
On the next, and subsequent right-side rows, increase one stitch either side of each marker by working a kfb stitch (8 sts increased on each row). For every wrong side row, purl.
Note: this produces a reasonably low neck. To heighten it, reduce the number of cast on sts in multiples of 8, and remove one sts from either side of marker when working out where to place them. Similarly, the neck can be lowered further by adding sts in multiples of 8.
Work in this pattern until there are 72 [82, 90, 100, 108, 116, 126, 136, 144], in the back, ending with a WS row.
 Body:
Body:Note: As with any top-down raglan, it is worth putting all sts on waste yarn and trying on the piece to check it fits precisely. Add or subtract a few rows (and their increases) if necessary.
(RS) Sl1, k to marker, remove marker, k1, turn and cast on 4 sts, replacing the marker in the middle of these 4sts to mark the side of the cardigan. Turn back and hold all sts to the next marker on waste yarn for the left arm. Knit till next marker (i.e. the back sts), remove maker, k1, turn, cast on 4 sts, replacing the marker in the middle of these to mark the other side. Turn back, move the right arm sts to waste yarn (i.e till next marker). Knit till end.
Work back and forth in st st for 2 inches (XS only), 2 and half inches (S, M and L), 3 inches (all X sizes) before starting side shaping. If the garment’s recipient is of above average height, you may wish to add a few rows. Again, it is worth trying on the piece (you can probably keep in on the needle) to see that it reaches roughly 5 inches above the smallest part of the waist.
Start side shaping. *(RS) [Knit till 2 sts before marker, ssk, k2tog] twice, knit till end.
(WS) purl. Work 4 rows st st. ** Repeat from * to ** four times. Work another 4 rows st st. *(RS) [Knit till 3 sts before marker, kfb, k1, kfb] twice, knit till end (WS) purl. Work 4 rows st st. ** Repeat from * to ** four times.
Note: If garment is to be worn by a particularly curvy recipient, you may wish to work 12 rows less before starting side shaping and add an extra set of increases and decreases.
Once side shaping is complete, hold sts (you can keep them on the needle, but you might wish to use point protectors).
Button band:Using size 3 needles (straights if you have them) pick up the held button band sts for the right-hand side of the cardigan. Work in basket-weave st until it is roughly the same length (or slightly smaller) body section you have worked so far, finishing with a WS row and hold at the end of the size 5 needle which is also holding the body sts. Depending on your choice of yarn, it may be worth blocking the pieces lightly with a steam iron before checking the length. Do not cast off any sts.
Pull the button band up alongside the edge of the cardigan, pin and seam together (note: you will probably not be seaming one row to one row, as the idea is that the button band is slightly tighter that the main part of the cardigan – though not so tight it bunches, a few less rows, worked on the smaller needles should be fine).
Repeat for the button-hole band (left hand side), but this time make a button-hole every 3 inches (I left 4 pattern repeats between button holes).
Using size 3 needles, work all body and button band/ button-hole band sts at once in basket-weave st for 4 pattern repeats, remembering to add a button hole where it is needed.
Bind off loosely with size 5 needles (I used a k2tog bind off).
SleevesStarting from side of the body and using size 5 circular or double-pointed needles needles, pick up and knit two sts from the 4 sts cast on when the body and arms were divided. Pick up 2 more between these and the start of the sleeve sts, and them together. Knit the sts held for the sleeve. Pick up two sts between these and the side of the body, and knit them together. Pick up and knit two sts from those cast on when the body and arms were divided. Place a marker on the needle to mark the center of the bottom of the sleeve and join to work in round. You will have increased the sleeve sts by 6.
Note: this approach should leave no hole in the armpit, but it is worth leaving an 8-inch tail of yarn before picking up sts here, so you can neaten up with a darning needle if necessary.
Work in sts for 4 rnds. You are working in the round now, so there is no need to slip any sts at the end.
Dec rnd: K2tog, knit till last two sts, ssk.
Work dec rnd every inch until there are 40 [44, 44, 48, 48, 52, 52, 56, 56] sts left. Work in st st until 3 inches from where a sweater would normally end.
Change to smaller needles and change to working flat. You will probably still wish to divide sts as if working in the round for an inch or so.
WS: sl1, kfb, p2, and work in basket-weave till end.
RS: as previous row.
Work two rows in pattern, always knitting the last st and slipping the first.
WS: sl1, kfb, p1, k2, and cont in patt.
RS: as previous row
Work two rows in pattern, always knitting the last st and slipping the first, and adding an extra knit st either side of the basket-weave.
WS: sl1, kfb, k2, and work in basket-weave till end.
RS: as previous row.
You should have now increased by 6 sts and have the start of a cuff made of basket-weave st, flanked by a slipped st on each side. Work in basket-weave st for a total of at least 6 pattern repeats, making a button hole at 4 and a half to 5 inches, 3 sts from the side of sleeve.
Once complete, bind off loosely with the larger needles and the same bind-off method as you used for the body.
Repeat for other sleeve.
 Finishing:
Sew up any holes left under arms. Weave in any remaining ends. Block lightly, applying washing instructions for your yarn.
Sew on buttons. For the cuffs, you should sew buttons on either side. The inside button is be used to wear the cuffs down; the outside button when pinning them up.